

The igloo, an iconic structure often associated with the Inuit people of the Arctic, is not just a symbol of human ingenuity but also a testament to the adaptability of cultures in extreme environments. Building an igloo is both an art and a science, requiring a deep understanding of snow properties, structural engineering, and the environment.
In this guide, we’ll delve deep into the process of building a traditional igloo, breaking down each step for the novice builder while also providing valuable insights for the more experienced. Whether you’re an adventurer, a history enthusiast, or someone looking for a unique winter project, this guide is for you.
More Than Just a Snow House
The igloo, while often seen as a simple snow structure, has a rich history and significance in the cultures of the Arctic. It’s not just a shelter but a testament to human adaptability and innovation.
History and Cultural Significance of the Igloo
The igloo, or ‘iglu’ in Inuktitut, has been used by the Inuit people for thousands of years. It served as a temporary shelter during hunting trips, providing warmth and protection from the harsh Arctic elements.
- Origins: The exact origins of the igloo are hard to pinpoint, but it’s believed to have been used by the Thule people, the ancestors of the Inuit, as early as 1000 AD.
- Cultural Significance: For the Inuit, the igloo is more than just a shelter. It’s a symbol of community, resilience, and the deep connection between the people and their environment.
The Science Behind
At first glance, an igloo might seem like a simple structure made of snow blocks. However, the science behind its construction and its ability to provide warmth is fascinating.
- Insulation: Snow is an excellent insulator. The trapped air in the snow acts as a barrier, preventing the cold outside air from coming in and the warm inside air from going out.
- Structural Integrity: The dome shape of the igloo distributes the weight evenly, ensuring stability. As the snowblocks freeze together, they form a solid structure that can withstand strong winds and heavy snowfall.
The Foundation
Before you start building, it’s crucial to understand the different types of snow and which is best suited for igloo construction.
The Properties of Snow
Snow, like any other material, has various properties that can affect its suitability for building. Not all snow is created equal, and understanding these differences is key to building a sturdy igloo.
- Fresh Snow: This type of snow is newly fallen and is soft and fluffy. While it’s great for snowball fights, it’s not ideal for igloo construction as it lacks the necessary cohesion.
- Settled Snow: After a few days, fresh snow begins to settle and compact. This type of snow is denser and can be used for building, but it might still be a bit too soft.
- Wind-packed Snow: This is the gold standard for igloo construction. As the name suggests, this snow has been packed by the wind, making it dense and cohesive. It’s perfect for cutting into blocks and building your igloo.
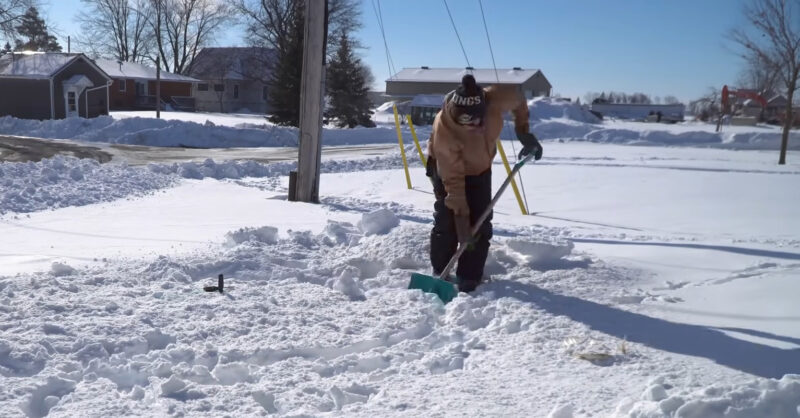
Selecting the Perfect Building Site
Location is everything. When building your igloo, you need to consider factors like wind direction, snow depth, and proximity to resources.
- Wind Direction: Ideally, the entrance of your igloo should face away from the prevailing wind to prevent drafts and snow from blowing in.
- Snow Depth: You’ll need a depth of at least 4 feet of snow to build a standard-sized igloo. This ensures you have enough material to work with and that the snow is likely dense enough for construction.
- Proximity to Resources: If you’re building your igloo as part of a camping trip, consider its proximity to resources like firewood, water, and food sources.
Crafting the Snow Blocks
Once you’ve chosen the right type of snow and the perfect location, it’s time to start crafting the snow blocks that will form your igloo.
Techniques for Cutting Snow Blocks
Cutting snow blocks requires precision and the right tools. With a few techniques, you can ensure your blocks are uniform and sturdy.
- Tools: A snow saw or a large knife is ideal for cutting snow blocks. Some also use machetes or even wood saws.
- Size and Shape: A standard snow block is around 2 feet long, 1 foot high, and 1 foot deep. The blocks should be rectangular, but the exact size can vary based on your design and the size of your igloo.
Stacking and Shaping the Blocks
Building an igloo is like building a puzzle. Each block must fit perfectly with the next, forming a sturdy and insulating structure.
- Starting the Base: Begin by laying out a circle of blocks, slightly angling them inwards. This will form the base of your igloo.
- Building Upwards: As you stack the next layers, continue to angle the blocks inwards, creating the dome shape of the igloo. Ensure each block fits snugly with the next, minimizing gaps.
- Shaping: Once your igloo is built, you can use a knife or saw to smooth out the interior, ensuring there are no protruding blocks or sharp edges.
Crafting the Entrance

The entrance of an igloo is more than just a way in and out. It plays a crucial role in maintaining the internal temperature and ensuring the structure remains warm and cozy.
The Importance of a Lowered Entrance
A lowered entrance acts as a cold trap, ensuring that the cold air (which is denser and heavier) remains outside the main dome of the igloo.
- Cold Air Dynamics: Cold air tends to sink, while warm air rises. By having a lowered entrance, the cold air is trapped in the entranceway, preventing it from entering the main dome.
- Maintaining Warmth: With the cold air trapped in the entrance, the warm air generated by body heat or a small heat source remains inside the igloo, ensuring a comfortable environment.
Designing the Entrance
The design of the entrance is crucial for both functionality and insulation.
- Tunnel Design: The entrance should be designed as a small tunnel, slightly curved to prevent direct wind from entering the igloo.
- Snow Block Door: A block of snow or a piece of animal hide can be used as a door, providing additional insulation and protection from the elements.
Ventilation
While insulation is crucial, so is ventilation. An igloo, being a closed structure, needs proper ventilation to ensure a continuous supply of fresh air.
The Need for Ventilation
Ventilation is essential for several reasons:
- Oxygen Supply: With people inside breathing, the oxygen levels can decrease. Proper ventilation ensures a continuous supply of fresh air.
- Preventing Condensation: Warm air inside the igloo can lead to condensation, which can make the interior wet. Ventilation helps in reducing this.
- Safety: If you’re using a heat source inside the igloo, proper ventilation prevents the buildup of harmful gases.
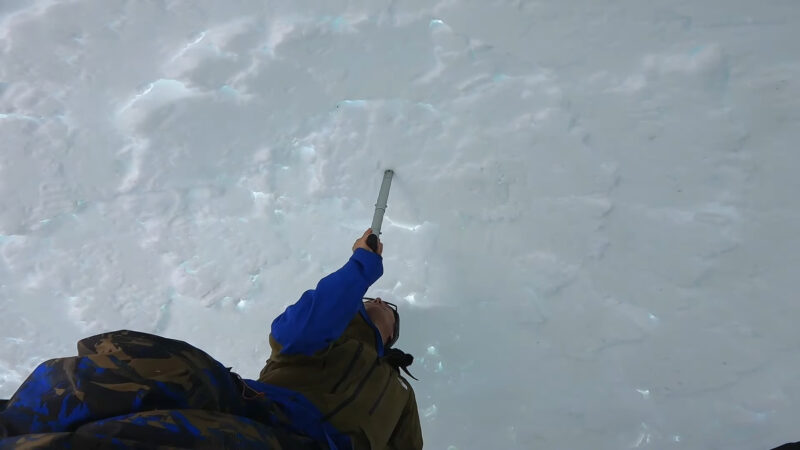
Creating Ventilation Holes
Creating ventilation holes is a simple yet crucial step in igloo construction.
- Positioning: Ventilation holes should be positioned at the top of the igloo to allow warm, stale air to escape and fresh air to circulate.
- Size: The holes shouldn’t be too large, as this can compromise insulation. A couple of small holes, each about the size of a quarter, are usually sufficient.
Interior Setup
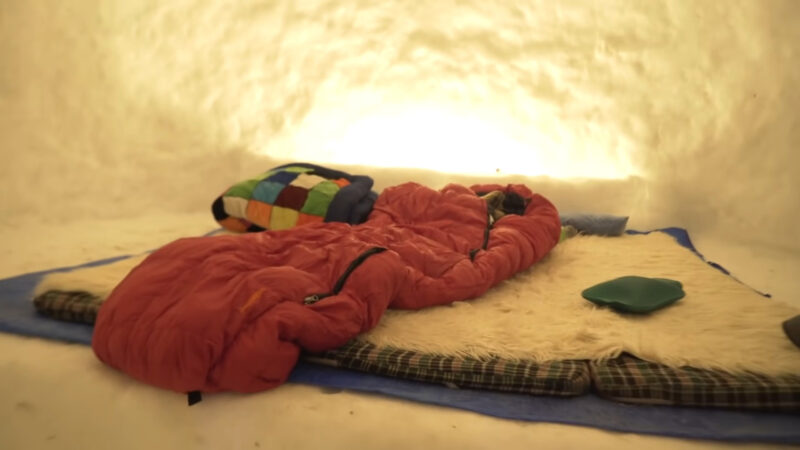
Once the structure is complete, it’s time to set up the interior to maximize comfort and functionality.
Creating a Sleeping Platform
Elevating the sleeping area has multiple benefits:
- Warmth: As mentioned earlier, warm air rises. By sleeping on an elevated platform, you’re positioning yourself in the warmest part of the igloo.
- Protection from Cold Air: The cold air remains at the bottom, ensuring the sleeping platform remains warm and cozy.
Organizing the Living Space
A well-organized igloo interior can greatly enhance the living experience.
- Storage Pockets: Carve out small pockets in the walls to store essential items like water, food, or tools.
- Seating Area: Create a seating area near the entrance, where you can cook or engage in other activities. This area is cooler, making it suitable for tasks that generate heat.
FAQs
How long does it take to build an igloo?
For someone experienced, it can take as little as 3-4 hours to build a standard-sized igloo. However, for beginners, it might take a whole day, especially if you’re learning as you go.
Can I use any tool to cut the snow blocks?
While traditional tools like snow knives are ideal, in a pinch, you can use items like machetes, wood saws, or even large kitchen knives. The key is to have a sharp, long blade that can cut through dense snow.
Is it safe to light a fire inside an igloo?
Yes, but with caution. Small candles or specialized camping stoves can be used. The heat from the fire will warm the igloo, and the dome structure will prevent the smoke from settling. However, ensure proper ventilation to prevent carbon monoxide buildup.
How long will an igloo last?
Depending on the weather conditions, an igloo can last anywhere from a few days to several weeks. Warm temperatures and direct sunlight will cause it to melt faster, while cold, cloudy days will help it last longer.
Can igloos be built in any snowy region?
While igloos are traditionally associated with the Arctic, they can be built in any region with sufficient snow. The key is to have dense, wind-packed snow suitable for construction.
Final Words
Building an igloo is a journey that connects us with ancient traditions, teaches us about the marvels of nature, and challenges our skills and creativity. Whether you’re building one for fun, for survival, or simply to tick off a bucket list item, the experience is sure to be unforgettable.
Armed with the knowledge from this guide, you’re now ready to embark on your igloo-building adventure. Cherish the adventure, learn from every setback, and foremost, delight in the tranquility and warmth of your snow-crafted refuge, whether it’s a traditional or an unconventional one.
Hello, I’m Philip Cooper. As an enthusiastic writer and explorer, I dedicate myself to uncovering the unique cultures and traditions of the Arctic regions. My journey began with a fascination for the resilient communities and their way of life in one of the world’s most challenging environments.
At The Fourth Continent, I share stories about the rich heritage, traditional practices, and the breathtaking landscapes of Greenland and its neighboring areas. Join me as we explore the wonders of the Arctic, bringing you closer to the heart of this magnificent land.